もくじ
初期設定
$ sudo su -
$ yum update
# vi /etc/sysconfig/selinux

SELINUX=disable
# reboot now
開発ツールとリポジトリのインストール
yum -y groupinstall "Development Tools" "Base"
yum install -y epel-release
rpm -ivh http://rpms.famillecollet.com/enterprise/remi-release-7.rpm
Apacheのインストール
# yum -y install httpd httpd-devel mod_ssl
# vi /etc/httpd/conf.d/app.conf


<VirtualHost *:80>

  DocumentRoot /var/www/vhosts/example.net/httpdocs/project/public
  ServerName example.net

  ErrorLog logs/example.net-error_log
  CustomLog logs/example.net-access_log common

  <Directory "/var/www/vhosts/example.net/httpdocs/project/public">
      AllowOverride All
      Require all granted
  </Directory>

</VirtualHost>
# vi /etc/httpd/conf/httpd.conf

#User apache ←無効化
#Group apache ←無効化
User yuu ←追加
Group apache ←追加
ユーザの追加
# sudo useradd yuu
# sudo passwd yuu
# sudo usermod -aG apache yuu
構文確認と自動起動
# httpd -t
# systemctl restart httpd
# systemctl enable httpd
PHP7インストール
yum -y install --enablerepo=epel libmcrypt libwebp
yum -y install --enablerepo=remi-php71 php php-cli php-devel php-common php-mbstring php-mysql php-phpunit-PHPUnit php-pecl-xdebug php-gd php-pdo php-xml php-mcrypt  php-fpm php-opcache php-pecl-apcu php-zip
Composerのインストール
# curl -sS https://getcomposer.org/installer | php
# sudo mv composer.phar /usr/local/bin/composer
バージョンの確認
# composer --version
Composer version 1.8.0 2018-12-03 10:31:16
Supervisorのインストール
yum install -y supervisor
Laravelのインストール
mkdir -p /var/www/vhosts/example.net/httpdocs/project
# composer global require laravel/installer
# composer create-project laravel/laravel /var/www/vhosts/example.net/httpdocs/project --prefer-dist
chmod 755 /var/www/vhosts/example.net/httpdocs/project
chmod 755 -R /var/www/vhosts/example.net/httpdocs/project/storage
chmod 755 -R /var/www/vhosts/example.net/httpdocs/project/bootstrap/cache
chown yuu:apache -R /var/www/vhosts/example.net/httpdocs/project
# ls -laht

total 252K
-rw-r--r--.  1 root root  706 Dec 26 12:24 .env
drwxr-xr-x. 12 root root 4.0K Dec 26 12:24 .
drwxr-xr-x. 45 root root 4.0K Dec 26 12:24 vendor
-rw-r--r--.  1 root root 174K Dec 26 12:24 composer.lock
drwxr-xr-x.  5 root root   46 Dec 26 12:20 storage
drwxr-xr-x.  4 root root   83 Dec 26 12:20 tests
-rw-r--r--.  1 root root  537 Dec 26 12:20 webpack.mix.js
drwxr-xr-x.  6 root root   53 Dec 26 12:20 resources
drwxr-xr-x.  2 root root   75 Dec 26 12:20 routes
-rw-r--r--.  1 root root  563 Dec 26 12:20 server.php
drwxr-xr-x.  5 root root  127 Dec 26 12:20 public
-rw-r--r--.  1 root root 4.0K Dec 26 12:20 readme.md
drwxr-xr-x.  2 root root  247 Dec 26 12:20 config
drwxr-xr-x.  5 root root   72 Dec 26 12:20 database
-rw-r--r--.  1 root root 1.1K Dec 26 12:20 package.json
-rw-r--r--.  1 root root 1.2K Dec 26 12:20 phpunit.xml
drwxr-xr-x.  6 root root   84 Dec 26 12:20 app
-rwxr-xr-x.  1 root root 1.7K Dec 26 12:20 artisan
drwxr-xr-x.  3 root root   34 Dec 26 12:20 bootstrap
-rw-r--r--.  1 root root 1.6K Dec 26 12:20 composer.json
-rw-r--r--.  1 root root  18K Dec 26 12:20 CHANGELOG.md
-rw-r--r--.  1 root root  213 Dec 26 12:20 .editorconfig
-rw-r--r--.  1 root root  655 Dec 26 12:20 .env.example
-rw-r--r--.  1 root root  111 Dec 26 12:20 .gitattributes
-rw-r--r--.  1 root root  151 Dec 26 12:20 .gitignore
drwxr-xr-x.  3 root root   17 Dec 26 12:20 ..
MySQL5.7のインストール
yum remove mariadb-libs
rm -rf /var/lib/mysql/
この時にPostfixもアンインストールされてしますので後で入れ直す。
インストールと自動起動
yum localinstall http://dev.mysql.com/get/mysql57-community-release-el7-7.noarch.rpm
yum -y install mysql-community-server

systemctl enable mysqld
systemctl start mysqld
Postfixのインストール
yum install postfix
systemctl start postfix
systemctl enable postfix
初期パスワード確認
# tail -n 500 /var/log/mysqld.log | grep root
2018-12-26T13:06:56.607248Z 1 [Note] A temporary password is generated for root@localhost: >/q#ylAu/3sZ
>/q#ylAu/3sZ
がMySQL5.7が自動生成した初期パスワード
# mysql_secure_installation

Securing the MySQL server deployment.

Enter password for user root:root初期パスワード入力


New password:新パスワード入力
Re-enter new password:新パスワード入力

後はEnterキーを押していく


Estimated strength of the password: 0
Do you wish to continue with the password provided?(Press y|Y for Yes, any other key for No) : y
By default, a MySQL installation has an anonymous user,
allowing anyone to log into MySQL without having to have
a user account created for them. This is intended only for
testing, and to make the installation go a bit smoother.
You should remove them before moving into a production
environment.

Remove anonymous users? (Press y|Y for Yes, any other key for No) :

 ... skipping.


Normally, root should only be allowed to connect from
'localhost'. This ensures that someone cannot guess at
the root password from the network.

Disallow root login remotely? (Press y|Y for Yes, any other key for No) :

 ... skipping.
By default, MySQL comes with a database named 'test' that
anyone can access. This is also intended only for testing,
and should be removed before moving into a production
environment.


Remove test database and access to it? (Press y|Y for Yes, any other key for No) :

 ... skipping.
Reloading the privilege tables will ensure that all changes
made so far will take effect immediately.

Reload privilege tables now? (Press y|Y for Yes, any other key for No) :

 ... skipping.
All done!
簡易設定
# vi /etc/my.cnf


[mysqld]
datadir=/var/lib/mysql
socket=/var/lib/mysql/mysql.sock

character-set-server = utf8mb4
collation-server = utf8mb4_bin

validate-password=OFF


innodb_large_prefix = ON           # 5.7.6以前
innodb_file_format = Barracuda     # 5.7.6以前
innodb_file_format_max = Barracuda # 5.7.8以前


# slowクエリ
log_output = TABLE,FILE
slow_query_log = ON
long_query_time = 1
min_examined_row_limit = 3
log_queries_not_using_indexes = ON
log_slow_admin_statements = ON

# Generalログ
general_log = ON
general_log_file=/var/log/mysqld_general.log


# Disabling symbolic-links is recommended to prevent assorted security risks
symbolic-links=0

log-error=/var/log/mysqld.log
pid-file=/var/run/mysqld/mysqld.pid
# systemctl restart mysqld
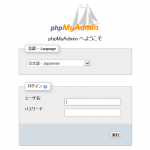
phpMyAdminのインストール
# yum -y install --enablerepo=remi-php71 phpMyAdmin
# vi /etc/httpd/conf.d/phpMyAdmin.conf


#Alias /phpMyAdmin /usr/share/phpMyAdmin ←無効化
#Alias /phpmyadmin /usr/share/phpMyAdmin ←無効化
Alias /hogephpmyadmin /usr/share/phpMyAdmin ←追加

<Directory /usr/share/phpMyAdmin/>
   AddDefaultCharset UTF-8
   AllowOverride all ←追加
   Require all granted ←追加
# systemctl restart httpd
http://example.net/hogephpmyadmin
でアクセス出来る。
本番環境ではphpMyAdminは削除しましょう。
テストDBの作成
# mysql -u root -p

mysql> create database testdb;
LaravelからDBへの接続
$ vi /var/www/vhosts/example.net/httpdocs/project/.env


DB_CONNECTION=mysql
DB_HOST=127.0.0.1
DB_PORT=3306
DB_DATABASE=homestead
DB_USERNAME=homestead
DB_PASSWORD=secret

↓変更

DB_CONNECTION=mysql
DB_HOST=127.0.0.1
DB_PORT=3306
DB_DATABASE=testdb
DB_USERNAME=root
DB_PASSWORD=hogehoge
関連記事 - More from my site -
 Laravel5.5 CentOS7インストール
 Laravel+EC2+IAM RoleからSESを利用する
 ECS+LaravelのリクエストログをCloudWatch Logs Insightで解析
- Laravel Google AuthenticatorによるTOTPログイン【Google2FA for Laravel】
- Laravel Slack通知
- Laravel クエリビルダー 複数JOINとWHERE条件 query builder
- Laravel aws-sdk-php-laravel AWSのAPIを叩くぞ
- Laravel7 bootstrap導入
- Laravel マイグレーションテンプレート
- Laravel map() Collectionを加工しよう
- Laravel filter() でCollectionから抽出しよう
- Laravel Redisへの保存
- Laravel Validatorの拡張
- Laravel ログをJSON化させる