
タイマーをつくる
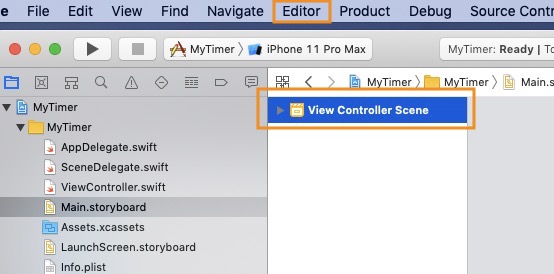
View Controller Sceneを選択して、Editorを選択します。
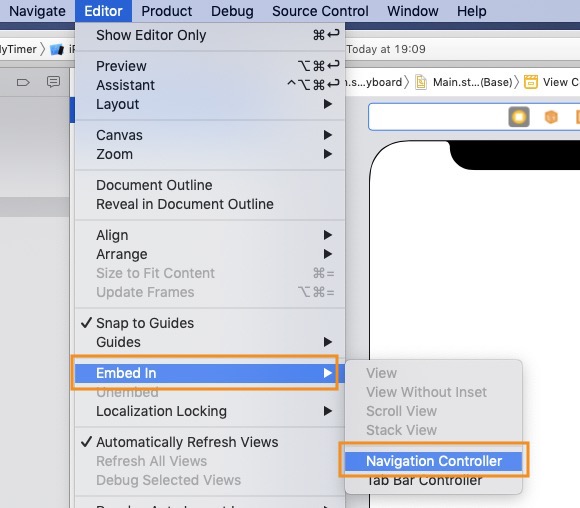
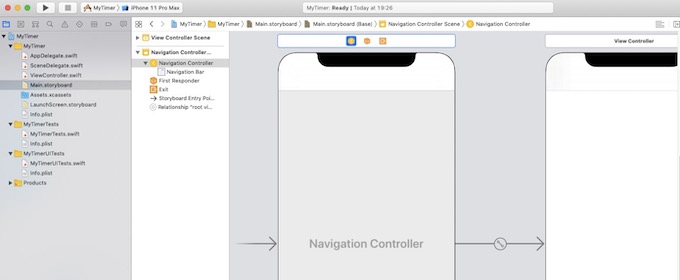
Navigation Controllerを選択します。
グレーの部分でControl + クリック
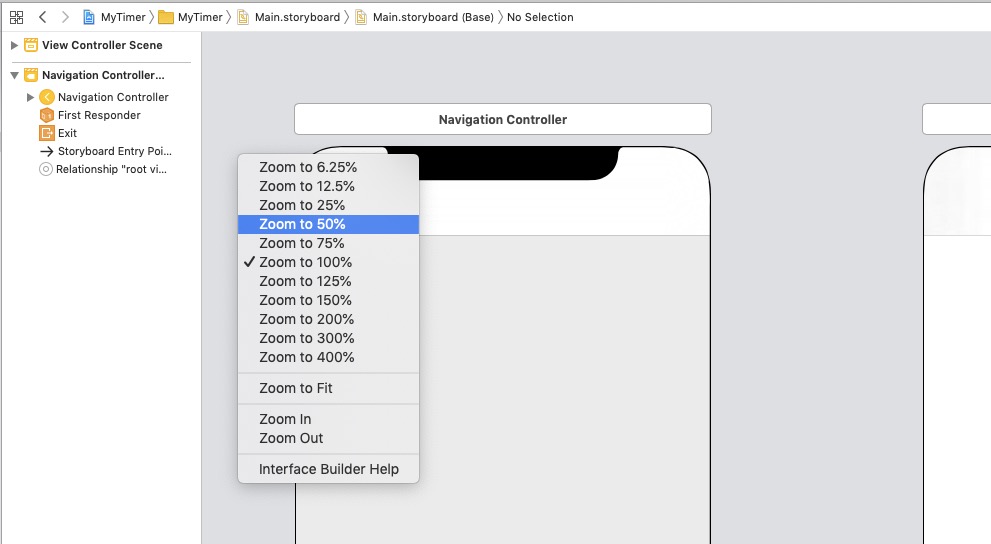
表示変更で50%に縮小して作業しやすくする。
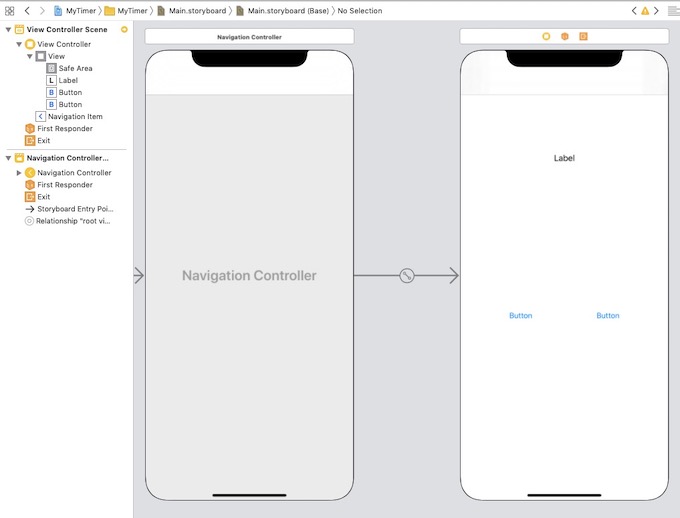
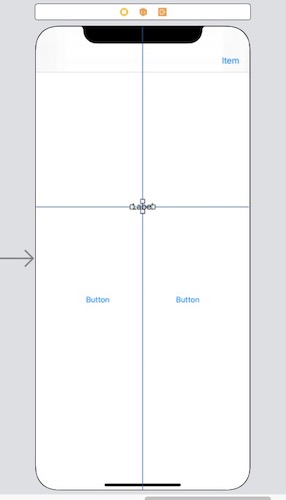
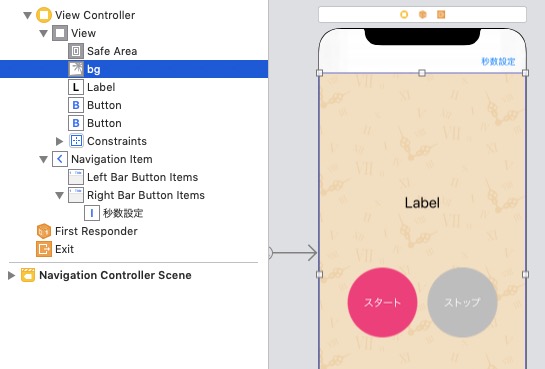
View ControllerにLabelとButton2つを配置します。
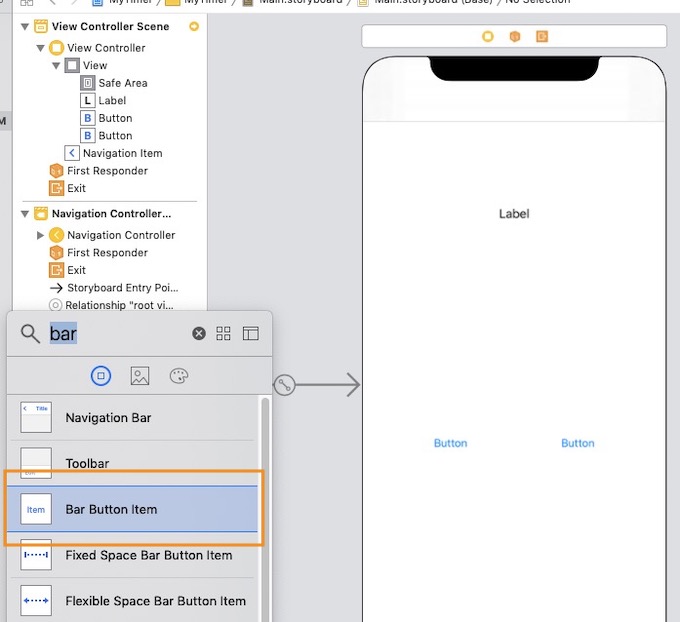
Bar Button Itemを配置します。
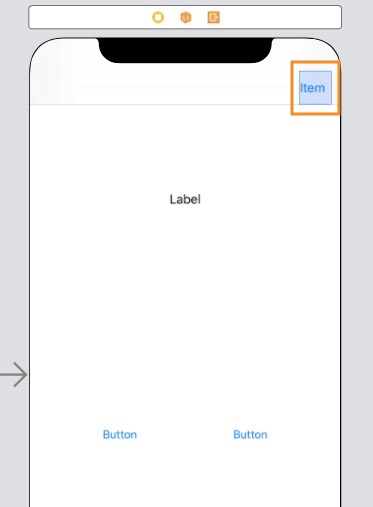
配置した。
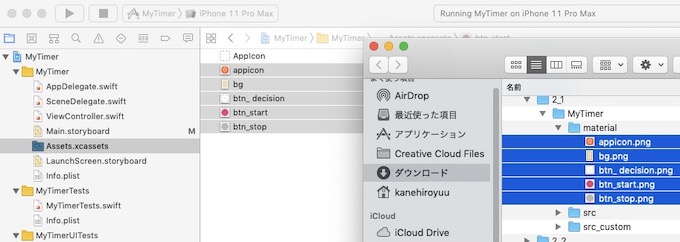
素材を配置
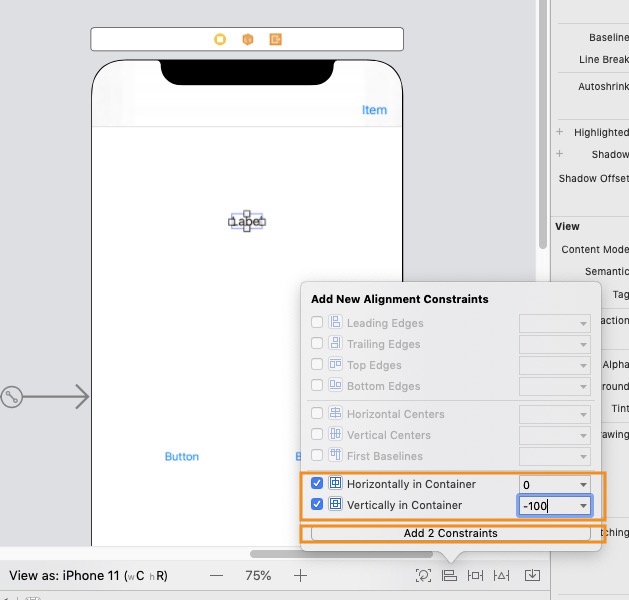
Label設定
- Horizontallyを0
- Verticallyを100ポイント上に

Labelの文字を大きく設定
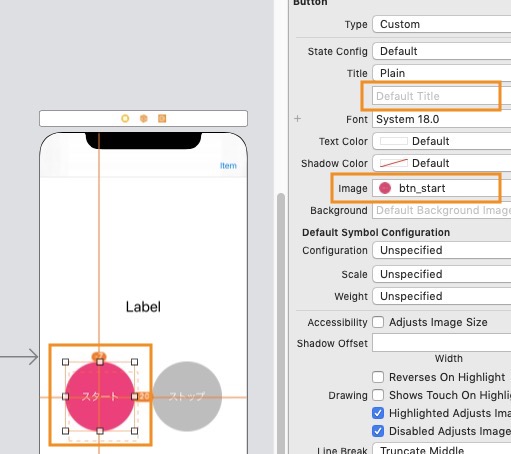
ボタンに背景画像を設定
レイアウトがずれるのでタイトルは空にする。
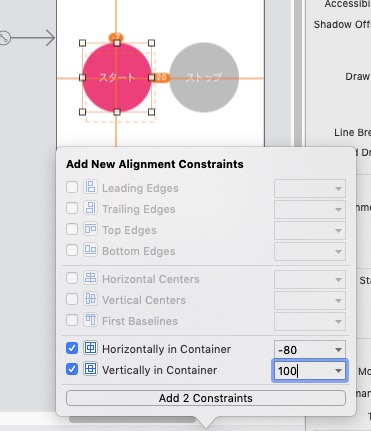
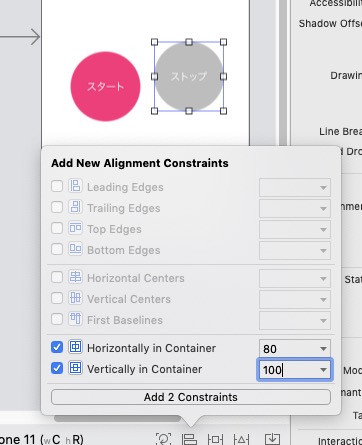
Costraintを設定
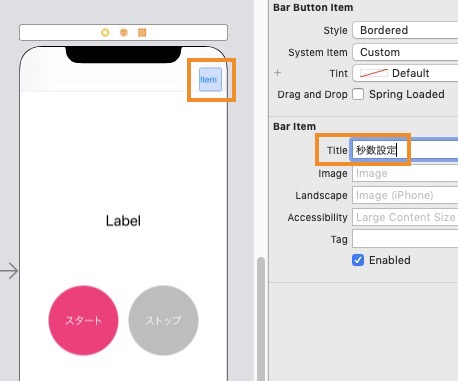
Bar button Iteのタイトル設定。
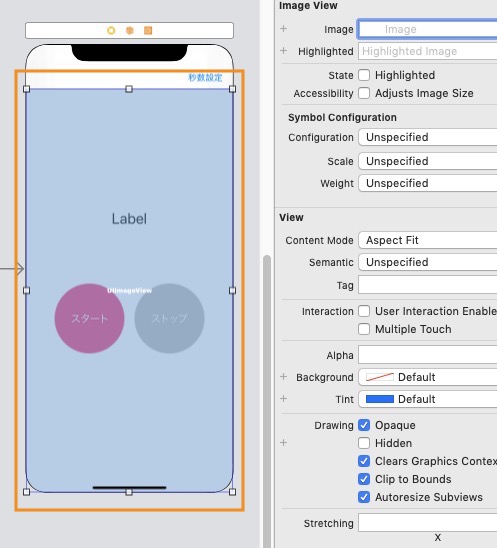
image viewを幅いっぱいにする
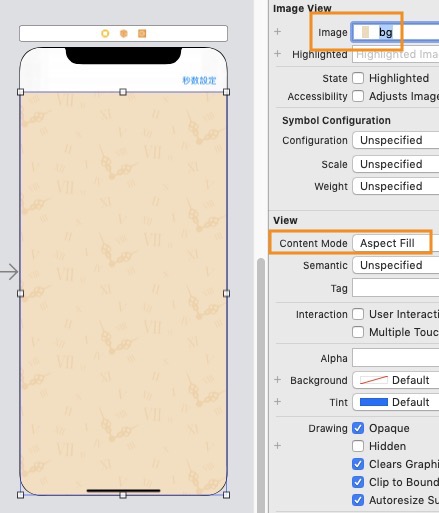
- imageに背景画像を設定
- Content ModeをAspect Fillに設定
bgをDocument Onlineで移動させて背面にする。
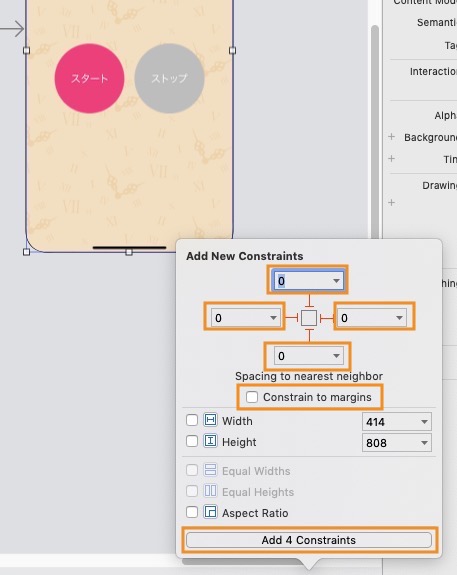
image viewのConstraintを設定
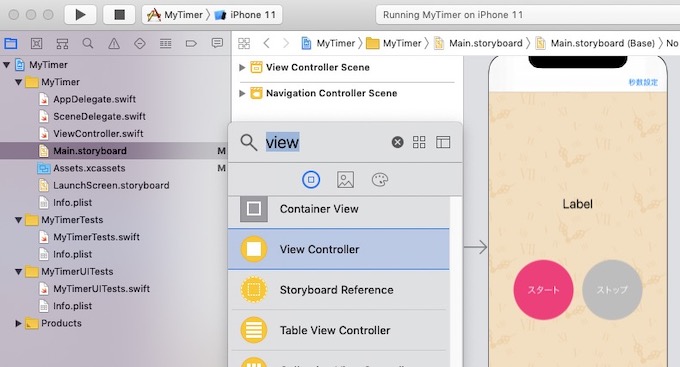
View controllerを追加して秒数設定の画面をつくる。
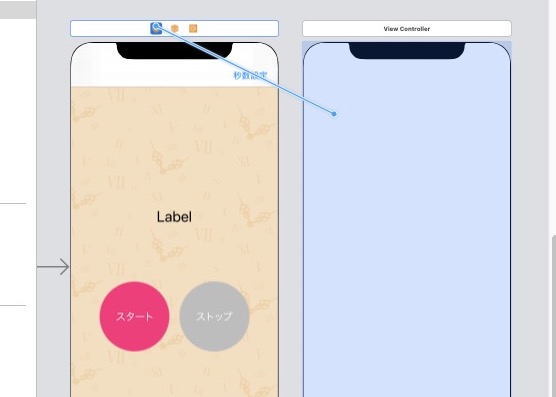
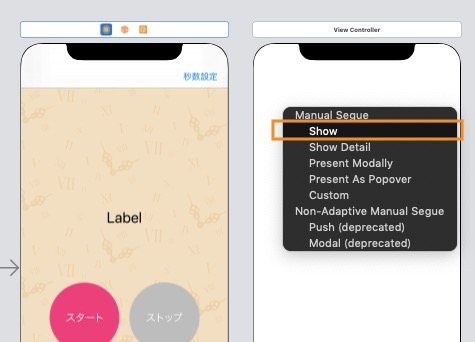
View Controllerを設置したら、画面遷移の設定。
Controlボタンをドラッグしながらドロップして遷移設定を行います。
Showを選択します。
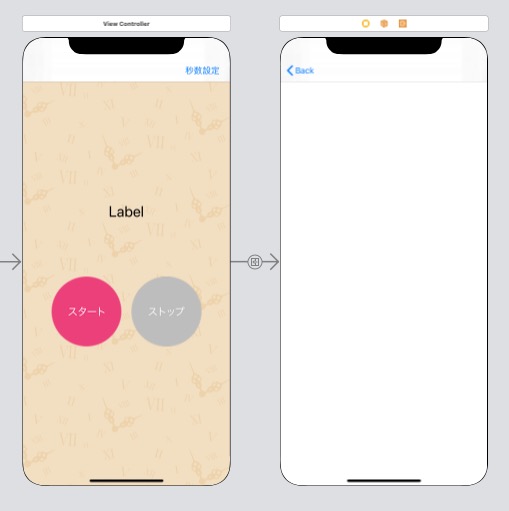
できた!
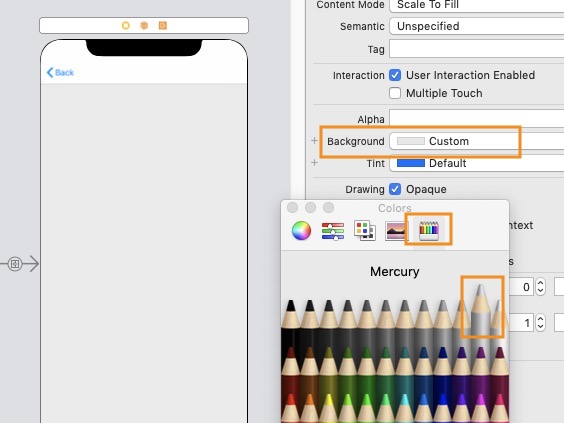
色鉛筆から選べるとかかわいい。
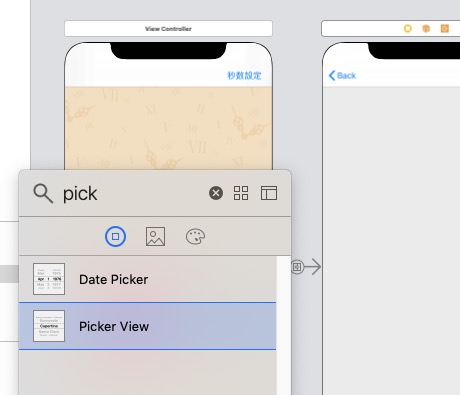
Picker Viewを配置する。
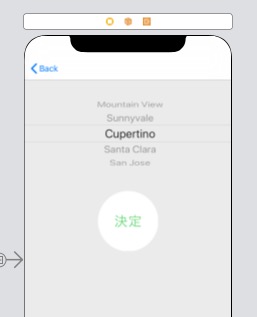
ボタンも配置した。
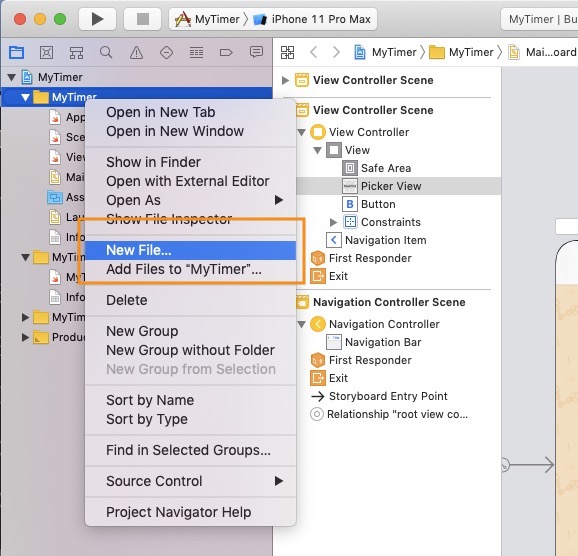
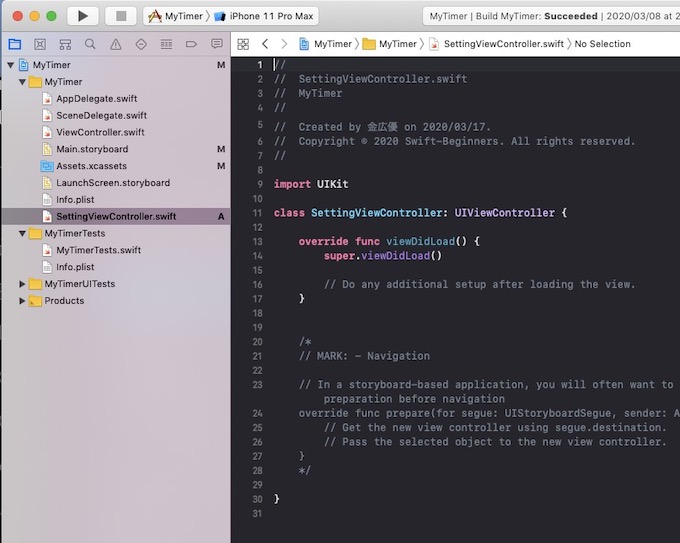
プロジェクトフォルダで右クリックで【New File】をクリックします。
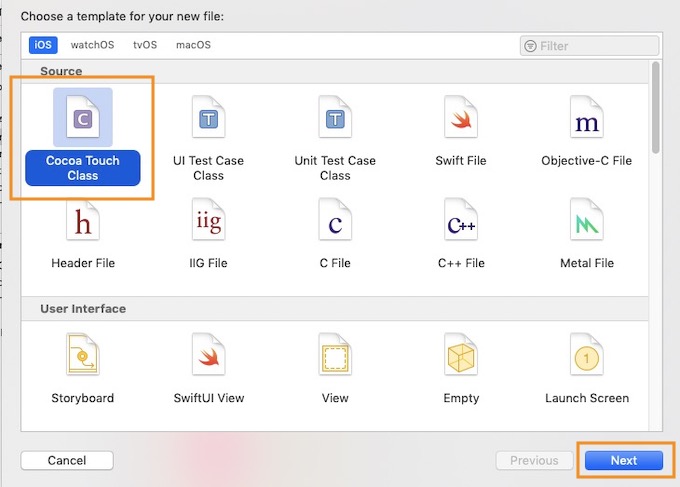
Cocoa Touch Classを選択してNextをクリックします。
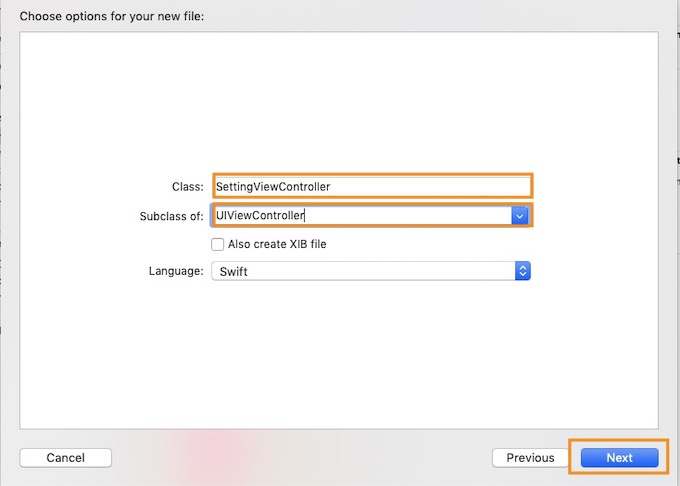
Classの名前は任意に、Subcalss ofをUIViewControllerを選択して、【Next】をクリックします。
関連記事 - More from my site -
 Xcode シミュレータ・アプリの日本語化対応
 PHP 配列の最大値を求める max() array_search()
 Mac遣い、親のパソコンを組む
 テイラー展開+マクローリン展開で近似
 AWS CloudWatchでオートスケールの複数EC2 モニタリング
 NTPリフレクション 対策
 IDリクワイアド
 Ubuntu sudoできるユーザ作成 Ansible
- [Solved] Let’s Encrypt Could not bind TCP port 80 because it is already in use by another process on this system (such as a web server)
- Terraformローカルでの構築用IAM Policy
 Laravel エラーハンドリング
 Zabbix3系 Load Averageを監視するテンプレートの追加
- Laravel S3へのPDFファイルアップロード, ダウンロード
- Laravel map() Collectionを加工しよう