バックナンバー
買えたゾ!🐰✨
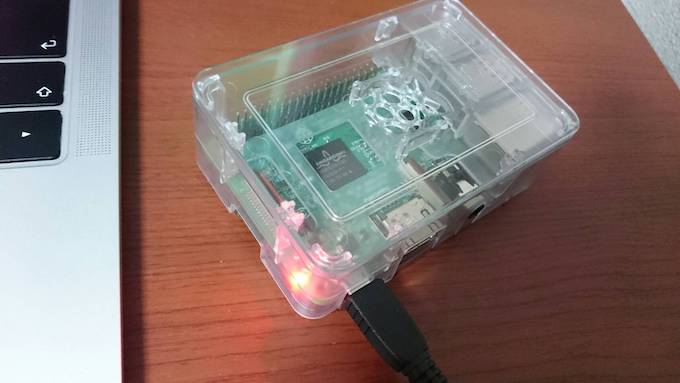
・ラズパイ3 model B
・ケース
・電源
・Microsd後はUSB温度計のロガーやな。 pic.twitter.com/stvavjNgXf
— 優さん🌷個人開発 (@yuu13n6) October 19, 2019
もくじ
Raspberry Pi 3 + USB温度計でグラフ化 AWS IoT Core その①概要
- Raspberry PiにMacからRaspbian(OS)をインストールさせる
- Raspberry Piの初期設定
- Raspberry PiのSSH設定
- Raspberry PiのIP固定化
ピタゴラスイッチの座組み
- Raspberry Pi 3 + USB温度計のロガーで記録し、AWS IoT Coreにデータ送信
- AWS IoT CoreがSQSにキューを送る
- SQSのキューをLambdaでDynamoDBに保存する
- 1日1回LambdaでDynamoDBのデータを叩いてS3にCSVファイルを出力する
- Quicksightでグラフ化して読む
主に利用した物理デバイス
- Mac
- Raspberry Pi 3 Model B
- Raspberry Pi 3ケース
- Micro SDカード
- 電源
- HDMIケーブル
Mac側作業
Micro SDカードにOSであるRaspbianを入れます。
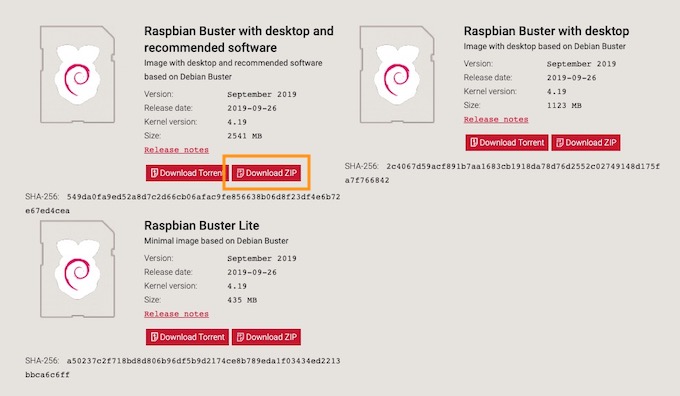
わくわく遊びたいので色々なものがぶっこまれたものを選択するよ。
クリックするとダウンロードがはじまる、しばし待たれよ。
SDカードにRaspbianを入れたいが、入れるSDカードがどこかわからない。
$ diskutil list

/dev/disk0 (internal):
   #:                       TYPE NAME                    SIZE       IDENTIFIER
   0:      GUID_partition_scheme                         251.0 GB   disk0
   1:                        EFI EFI                     314.6 MB   disk0s1
   2:                 Apple_APFS Container disk1         250.7 GB   disk0s2

/dev/disk1 (synthesized):
   #:                       TYPE NAME                    SIZE       IDENTIFIER
   0:      APFS Container Scheme -                      +250.7 GB   disk1
                                 Physical Store disk0s2
   1:                APFS Volume Macintosh HD            94.2 GB    disk1s1
   2:                APFS Volume Preboot                 45.9 MB    disk1s2
   3:                APFS Volume Recovery                511.4 MB   disk1s3
   4:                APFS Volume VM                      4.3 GB     disk1s4

/dev/disk2 (disk image):
   #:                       TYPE NAME                    SIZE       IDENTIFIER
   0:      GUID_partition_scheme                        +72.4 MB    disk2
   1:                  Apple_HFS Avira Installer         72.3 MB    disk2s1

/dev/disk3 (external, physical):
   #:                       TYPE NAME                    SIZE       IDENTIFIER
   0:     FDisk_partition_scheme                        *15.5 GB    disk3
   1:             Windows_FAT_32 NO NAME                 15.5 GB    disk3s1
disk1〜4まであって皆目検討がつかないですね。。
- /dev/disk0はMacの容量と同じで危険だ!
- /dev/disk1はようわからんがまずい匂いがぷんぷんする!
- /dev/disk2はアンチウィルスソフトのAvira関連かな?
購入したMicro SDカードは16GBのディスクだから。。
なんだか/dev/disk3がそれっぽいですね!
フォーマット
$ diskutil eraseDisk FAT32 RPI /dev/disk3
$ diskutil list

・・・

/dev/disk3 (external, physical):
   #:                       TYPE NAME                    SIZE       IDENTIFIER
   0:      GUID_partition_scheme                        *15.5 GB    disk3
   1:                        EFI EFI                     209.7 MB   disk3s1
   2:       Microsoft Basic Data RPI ←●変更された         15.3 GB    disk3s2
アンマウント
$ diskutil unmountDisk /dev/disk3

Unmount of all volumes on disk3 was successful
Raspbianの展開
$ unzip $HOME/Downloads/2019-09-26-raspbian-buster-full.zip
イメージをmicro SDカードに書き込みます。
$ sudo dd bs=1m if=2019-09-26-raspbian-buster-full.img of=/dev/disk3

Password:
6496+0 records in
6496+0 records out
6811549696 bytes transferred in 375.969124 secs (18117311 bytes/sec)
書き込み先のデバイスを間違えるとお釈迦なので注意しましょう。
$ df -h

Filesystem      Size   Used  Avail Capacity iused               ifree %iused  Mounted on
/dev/disk1s1   233Gi   96Gi  134Gi    42% 1384687 9223372036853391120    0%   /
devfs          191Ki  191Ki    0Bi   100%     662                   0  100%   /dev
/dev/disk1s4   233Gi  3.0Gi  134Gi     3%       3 9223372036854775804    0%   /private/var/vm
map -hosts       0Bi    0Bi    0Bi   100%       0                   0  100%   /net
map auto_home    0Bi    0Bi    0Bi   100%       0                   0  100%   /home
/dev/disk2s1    69Mi   13Mi   56Mi    20%     133          4294967146    0%   /Volumes/Avira Installer
/dev/disk1s3   233Gi  488Mi  134Gi     1%      37 9223372036854775770    0%   /Volumes/Recovery
/dev/disk3s1   252Mi   53Mi  199Mi    21%       0                   0  100%   /Volumes/boot
SSHの有効化
$ touch /Volumes/boot/ssh
Micro SDカードのアンマウント
$ sudo umount -f /Volumes/boot
$ diskutil umountDisk /dev/disk3

Unmount of all volumes on disk3 was successful
SDカードをRaspberry Pieへ
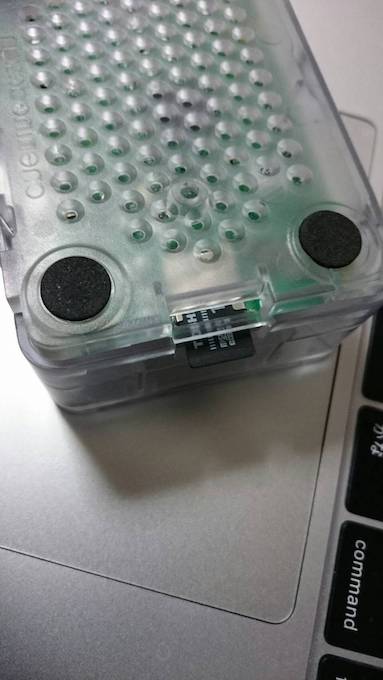
電源を入れる
じゃかじゃん。
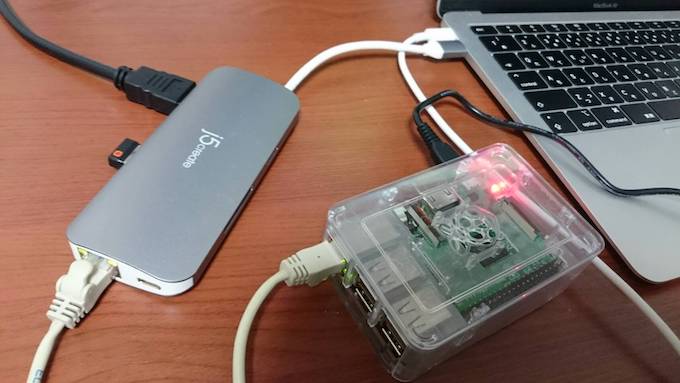
MacとRaspberry Piを繋ぐ
直接LANでMacとRasberry Piを繋ぎます。
アカウント情報
- ユーザ:pi
- パスワード:raspberry
Macのターミナルから接続
~ $ ssh pi@raspberrypi.local

The authenticity of host 'raspberrypi.local (fe80::e251:42b6:939b:6b23%en5)' can't be established.
ECDSA key fingerprint is SHA256:3OVcWsPomvQ3spkjckCPz6oKKguTxp+nwgdCrDVVRYA.
Are you sure you want to continue connecting (yes/no)? yes ←●入力
Warning: Permanently added 'raspberrypi.local,fe80::e251:42b6:939b:6b23%en5' (ECDSA) to the list of known hosts.
pi@raspberrypi.local's password:<●パスワード"raspberry"入力>

Linux raspberrypi 4.19.75-v7+ #1270 SMP Tue Sep 24 18:45:11 BST 2019 armv7l

The programs included with the Debian GNU/Linux system are free software;
the exact distribution terms for each program are described in the
individual files in /usr/share/doc/*/copyright.

Debian GNU/Linux comes with ABSOLUTELY NO WARRANTY, to the extent
permitted by applicable law.
Last login: Thu Sep 26 01:46:19 2019

SSH is enabled and the default password for the 'pi' user has not been changed.
This is a security risk - please login as the 'pi' user and type 'passwd' to set a new password.

pi@raspberrypi:~ $
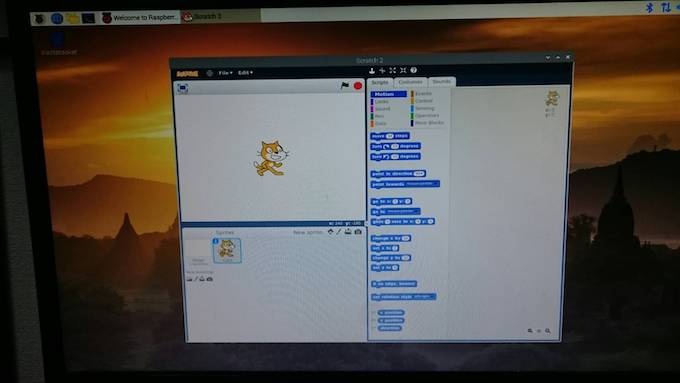
ログインできました!
viの設定
キーボードの矢印が利用できないので設定します。
- 矢印キーの有効化
- バックスペースキーの有効化
.vimrcファイルを作成
$ vi .vimrc

set nocompatible
set backspace=indent,eol,start
一旦ログアウトします。
$ exit
再接続
$ ssh pi@raspberrypi.local
Raspberry Pi Wifiの設定
Raspberry Pi側作業
$ sudo vi /etc/wpa_supplicant/wpa_supplicant.conf


ctrl_interface=DIR=/var/run/wpa_supplicant GROUP=netdev
update_config=1
country=JP
network={
   ssid="<ESSID>"
   psk="<パスワード>"
}
再起動
$ sudo reboot now
MacからRaspberry Piに接続する
$ ssh pi@raspberrypi.local
Raspberry Piから外にPingを打って返ってきたらインターネットとの接続が取れてます。
pi@raspberrypi:~ $ ping www.yuulinux.tokyo

PING www.yuulinux.tokyo (150.95.130.69) 56(84) bytes of data.
64 bytes from www.yuulinux.tokyo (150.95.130.69): icmp_seq=1 ttl=50 time=106 ms
64 bytes from www.yuulinux.tokyo (150.95.130.69): icmp_seq=2 ttl=50 time=116 ms
Raspberry Piの IP固定化
イーサネット接続でなくて、SSHで繋がりたいのでIPを固定化します。
$ ifconfig

eth0: flags=4163<UP,BROADCAST,RUNNING,MULTICAST>  mtu 1500
        inet 169.254.252.32  netmask 255.255.0.0  broadcast 169.254.255.255
        inet6 fe80::e251:42b6:939b:6b23  prefixlen 64  scopeid 0x20<link>
        ether b8:27:eb:8e:55:7e  txqueuelen 1000  (Ethernet)
        RX packets 418  bytes 87724 (85.6 KiB)
        RX errors 0  dropped 0  overruns 0  frame 0
        TX packets 191  bytes 38333 (37.4 KiB)
        TX errors 0  dropped 0 overruns 0  carrier 0  collisions 0

lo: flags=73<UP,LOOPBACK,RUNNING>  mtu 65536
        inet 127.0.0.1  netmask 255.0.0.0
        inet6 ::1  prefixlen 128  scopeid 0x10<host>
        loop  txqueuelen 1000  (Local Loopback)
        RX packets 0  bytes 0 (0.0 B)
        RX errors 0  dropped 0  overruns 0  frame 0
        TX packets 0  bytes 0 (0.0 B)
        TX errors 0  dropped 0 overruns 0  carrier 0  collisions 0

wlan0: flags=4163<UP,BROADCAST,RUNNING,MULTICAST>  mtu 1500
        inet 192.168.179.3  netmask 255.255.255.0  broadcast 192.168.179.255
        inet6 2001:268:c0a4:9808:d6ba:811d:44b3:8a72  prefixlen 64  scopeid 0x0<global>
        inet6 fe80::9396:bbbd:f066:d44c  prefixlen 64  scopeid 0x20<link>
        ether b8:27:eb:db:00:2b  txqueuelen 1000  (Ethernet)
        RX packets 201  bytes 37669 (36.7 KiB)
        RX errors 0  dropped 0  overruns 0  frame 0
        TX packets 173  bytes 25506 (24.9 KiB)
        TX errors 0  dropped 0 overruns 0  carrier 0  collisions 0
wlanを見ると、192.168.179.3がIPアドレスだということがわかります。
$ vi /etc/dhcpcd.conf

interface wlan0
static ip_address=192.168.179.201/24
static routers=192.168.179.1
static domain_name_servers=192.168.179.1
再起動
$ sudo reboot now
Mac側から
$ ssh pi@192.168.179.201


The authenticity of host '192.168.179.201 (192.168.179.201)' can't be established.
ECDSA key fingerprint is SHA256:3OVcWsPomvQ3spkjckCPz6oKKguTxp+nwgdCrDVVRYA.
Are you sure you want to continue connecting (yes/no)? yes
Warning: Permanently added '192.168.179.201' (ECDSA) to the list of known hosts.
pi@192.168.179.201's password:
Linux raspberrypi 4.19.75-v7+ #1270 SMP Tue Sep 24 18:45:11 BST 2019 armv7l

The programs included with the Debian GNU/Linux system are free software;
the exact distribution terms for each program are described in the
individual files in /usr/share/doc/*/copyright.

Debian GNU/Linux comes with ABSOLUTELY NO WARRANTY, to the extent
permitted by applicable law.
Last login: Sun Oct 20 08:49:22 2019

SSH is enabled and the default password for the 'pi' user has not been changed.
This is a security risk - please login as the 'pi' user and type 'passwd' to set a new password.

pi@raspberrypi:~ $
繋がりました。
さようならLANケーブル。
LANケーブルから解放されて悠々自適なRaspberry Pi さん。
関連記事 - More from my site -
 セッションハイジャック
 Laravel Redisへの保存
 Nginx+PHP-FPMチューニング worker_connections are not enough while connecting to upstream
 Apache2.2系 400 Bad Request _のあるホスト設定でのエラー回避
- 二項分布 多項分布
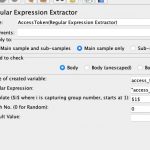 JMeter 正規表現で変数を扱う
 Vuls 本番をスキャン出来ない時にパッケージを再現する
 AWS VPCとRTX1100のVPN接続
 Docker利用時のセキュリティ留意点
- Laravel ジョブ 失敗時の挙動
 MVCの役割
 2つのCSVから値の重複を抽出するパフォーマンステストしたった
- ベイズの定理
 Go Udemy beginner Fintech