![]()
事前準備
EC2 + Ubuntu + LEMP + LaravelのAMIを作成する
Ubuntu 18.04 LTS – Bionicを選択
パッケージの更新
$ sudo apt-get update
$ sudo apt -y install software-properties-common
$ sudo add-apt-repository ppa:ondrej/php
$ sudo apt-get update
PHPのインストール
$ sudo apt-get install php7.4 php7.4-mbstring php7.4-xml php7.4-cli hhvm php7.4-fpm php7.4-mysql -y
$ sudo vi /etc/php/7.4/fpm/pool.d/www.conf

user = www-data
group = www-data
listen.mode = 0660
listen = /var/run/php/php7.4-fpm.sock
$ sudo systemctl restart php7.4-fpm
Nginxインストール
$ sudo apt-get install nginx -y
$ sudo chown -R www-data:www-data /var/www
$ sudo chmod -R 0755 /var/www
$ sudo vim /etc/nginx/sites-available/gitlab-cicd-test.yuulinux.tokyo.conf


server {
    listen 80 default_server;
    listen [::]:80 default_server;
    root /var/www/product-project/public;
    index index.php index.html;
    server_name your_ip_address;
    location / {
        try_files $uri $uri/ /index.php?$query_string;
    }
    # pass the PHP scripts to FastCGI server
    #
    location ~ \.php$ {
        include snippets/fastcgi-php.conf;
        fastcgi_pass unix:/run/php/php7.4-fpm.sock;
    }
}
$ cd /etc/nginx/sites-enabled
$ sudo rm default
$ sudo ln -s /etc/nginx/sites-available/gitlab-cicd-test.yuulinux.tokyo.conf
$ sudo systemctl restart nginx
MariaDB
$ sudo apt-get install mariadb-server -y
$ sudo su

# mysql_secure_installation

NOTE: RUNNING ALL PARTS OF THIS SCRIPT IS RECOMMENDED FOR ALL MariaDB
      SERVERS IN PRODUCTION USE!  PLEASE READ EACH STEP CAREFULLY!

In order to log into MariaDB to secure it, we'll need the current
password for the root user.  If you've just installed MariaDB, and
you haven't set the root password yet, the password will be blank,
so you should just press enter here.

Enter current password for root (enter for none):
OK, successfully used password, moving on...

Setting the root password ensures that nobody can log into the MariaDB
root user without the proper authorisation.

Set root password? [Y/n]
New password:
Re-enter new password:
Sorry, you can't use an empty password here.

New password:
Re-enter new password:
Password updated successfully!
Reloading privilege tables..
 ... Success!


By default, a MariaDB installation has an anonymous user, allowing anyone
to log into MariaDB without having to have a user account created for
them.  This is intended only for testing, and to make the installation
go a bit smoother.  You should remove them before moving into a
production environment.

Remove anonymous users? [Y/n]
 ... Success!

Normally, root should only be allowed to connect from 'localhost'.  This
ensures that someone cannot guess at the root password from the network.

Disallow root login remotely? [Y/n]
 ... Success!

By default, MariaDB comes with a database named 'test' that anyone can
access.  This is also intended only for testing, and should be removed
before moving into a production environment.

Remove test database and access to it? [Y/n]
 - Dropping test database...
 ... Success!
 - Removing privileges on test database...
 ... Success!

Reloading the privilege tables will ensure that all changes made so far
will take effect immediately.

Reload privilege tables now? [Y/n]
 ... Success!

Cleaning up...

All done!  If you've completed all of the above steps, your MariaDB
installation should now be secure.

Thanks for using MariaDB!
$ mysql -u root -p

> CREATE DATABASE sampleapp;
> CREATE USER 'www-data'@'localhost' IDENTIFIED BY 'password';
> GRANT ALL PRIVILEGES ON sampleapp.* TO 'www-data'@'localhost';
> FLUSH PRIVILEGES;

> SHOW GRANTS FOR 'ubuntu'@'localhost';
+---------------------------------------------------------------------------------------------------------------+
| Grants for ubuntu@localhost                                                                                   |
+---------------------------------------------------------------------------------------------------------------+
| GRANT USAGE ON *.* TO 'ubuntu'@'localhost' IDENTIFIED BY PASSWORD '*2470C0C06DEE42FD1618BB99005ADCA2EC9D1E19' |
| GRANT ALL PRIVILEGES ON `sampleapp`.* TO 'ubuntu'@'localhost'                                                 |
+---------------------------------------------------------------------------------------------------------------+
2 rows in set (0.00 sec)
MariaDB [(none)]> exit
Bye
# sudo systemctl restart mysql
Ctrl + xを教えてyを選択、そしてEnterを押すと保存される
www-dataにログインできるようにする
$ sudo usermod -s /bin/bash www-data
$ sudo su - www-data
$ mysql -u www-data -p
Enter password:password

Welcome to the MariaDB monitor.  Commands end with ; or \g.
Your MariaDB connection id is 30
Server version: 10.1.44-MariaDB-0ubuntu0.18.04.1 Ubuntu 18.04

Copyright (c) 2000, 2018, Oracle, MariaDB Corporation Ab and others.

Type 'help;' or '\h' for help. Type '\c' to clear the current input statement.

MariaDB [(none)]> exit
Bye
www-dataでmysqlにログインできるようになった
$ sudo apt-get install zip unzip -y
$ cd /var/www/html
$ sudo rm index.nginx-debian.html
Composerインストール
$ curl -sS https://getcomposer.org/installer | php
$ sudo mv composer.phar /usr/local/bin/composer
Laravelインストール
$ cd /var/www/
$ composer create-project "laravel/laravel=5.7.*" product-project
$ sudo chmod -R 0775 /var/www/product-project/storage
$ sudo chown -R www-data:www-data /var/www/product-project/storage
$ cd /var/www/product-project/
$ vi /var/www/product-project/.env

・・・

DB_CONNECTION=mysql
DB_HOST=127.0.0.1
DB_PORT=3306
DB_DATABASE=sampleapp
DB_USERNAME=www-data
DB_PASSWORD=password

・・・
$ php artisan migrate
$ php artisan config:clear
http://IPアドレス/
Laravelが表示された
$ vi /var/www/product-project/resources/views/welcome.blade.php


<div>
    @if(DB::connection()->getDatabaseName())
        <p>Database: {{ DB::connection()->getDatabaseName() }}</p>
    @endif
</div>
Database: sampleappが表示された!
OK!
$ vi /var/www/product-project/config/logging.php


    'channels' => [
        'stack' => [
            'driver' => 'stack',
            'channels' => ['single'],
            'ignore_exceptions' => false,
        ],

        'single' => [
            'driver' => 'single',
            'path' => storage_path('logs/laravel.log'),
            'level' => 'debug',
        ],

■daily変更

        'daily' => [
            'driver' => 'daily',
            'path' => storage_path('logs/laravel.log'),
            'level' => 'debug',
            'days' => 14,
        ],

↓変更

        'daily' => [
            'driver' => 'daily',
            'path' => storage_path('logs/laravel.log'),
            'level' => 'debug',
            'days' => 30,
            'tap' => [
                App\Logging\LogProcessor::class,
                App\Logging\LogFormatter::class
            ]
        ],

●追加

        'request' => [
            'name' => 'request',
            'driver' => 'daily',
            'path' => storage_path('logs/request.log'),
            'level' => 'debug',
            'days' => 30,
        ],
        'query' => [
            'driver' => 'daily',
            'path' => storage_path('logs/query.log'),
            'level' => 'debug',
            'days' => 90
        ],

●追加 ここまで

        'slack' => [
            'driver' => 'slack',
            'url' => env('LOG_SLACK_WEBHOOK_URL'),
            'username' => 'Laravel Log',
            'emoji' => ':boom:',
            'level' => 'critical',
        ],
.env
APP_NAME=Laravel
APP_ENV=local
APP_KEY=base64:i4mCPefNF12taWlu/ZsE9Aaa+BlxdeS9QaOS4tzTmeU=
APP_DEBUG=true
APP_URL=http://localhost

LOG_CHANNEL=stack
DB_QUERY_LOG=true
DEBUG_EXCEPTION=true
DEBUG_REQUEST=true
DEBUG_LOG=true

DB_CONNECTION=mysql
DB_HOST=127.0.0.1
DB_PORT=3306
DB_DATABASE=sampleapp
DB_USERNAME=www-data
DB_PASSWORD=password

BROADCAST_DRIVER=log
CACHE_DRIVER=file
QUEUE_CONNECTION=sync
SESSION_DRIVER=file
SESSION_LIFETIME=120

REDIS_HOST=127.0.0.1
REDIS_PASSWORD=null
REDIS_PORT=6379

MAIL_DRIVER=smtp
MAIL_HOST=smtp.mailtrap.io
MAIL_PORT=2525
MAIL_USERNAME=null
MAIL_PASSWORD=null
MAIL_ENCRYPTION=null

PUSHER_APP_ID=
PUSHER_APP_KEY=
PUSHER_APP_SECRET=
PUSHER_APP_CLUSTER=mt1

MIX_PUSHER_APP_KEY="${PUSHER_APP_KEY}"
MIX_PUSHER_APP_CLUSTER="${PUSHER_APP_CLUSTER}"
クエリログの出力
$ vi /var/www/product-project/app/Providers/AppServiceProvider.php


<?php

namespace App\Providers;

use Illuminate\Support\ServiceProvider;
use Illuminate\Support\Facades\Schema;

class AppServiceProvider extends ServiceProvider
{
    /**
     * Register any application services.
     *
     * @return void
     */
    public function register()
    {
        //
    }

    /**
     * Bootstrap any application services.
     *
     * @return void
     */
    public function boot()
    {
        //  SQLSTATE[42000]: Syntax error or access violation: 1071 Specified key was too long; max key length is 767 bytes 対策
        Schema::defaultStringLength(191);


        // ログ出力
        // insert と update と delete の更新処理を確認可能
        // tail -f storage/logs/laravel.log | grep -e "0 => 'i" -e "0 => 'u" -e "0 => 'd"
        if (env('DB_QUERY_LOG', false)) {
            \DB::listen(
                function ($query) {
                    $sql = $query->sql;
                    for ($i = 0; $i < count($query->bindings); $i++) {
                        $sql = preg_replace("/\?/", $query->bindings[$i], $sql, 1);
                    }
                    // Query channelのログレベルはdebugになっている
                    \Log::channel('query')->debug(
                        "SQL",
                        ["time" => sprintf("%.2f ms", $query->time), "sql" => $sql]
                    );
                }
            );
        }
    }
}
$ vi /var/www/product-project/app/Http/Middleware/RequestLogger.php


<?php

namespace App\Http\Middleware;

use Closure;

class RequestLogger
{
    /**
     * Handle an incoming request.
     *
     * @param  \Illuminate\Http\Request  $request
     * @param  \Closure  $next
     * @return mixed
     */
    public function handle($request, Closure $next)
    {
        if (env('DEBUG_REQUEST', false)) {
            $this->_writeLog($request);
        }
        return $next($request);
    }

    private function _writeLog($request): void
    {
        \Log::channel('request')->debug(
            $request->method()
            . " : "
            . json_encode(
                ['url' => $request->fullUrl(), 'request' => $request->all(), 'header' => $request->headers->all()],
                JSON_UNESCAPED_UNICODE | JSON_UNESCAPED_SLASHES
            )
        );
    }
}
app/Http/Kernel.php へ追記
    protected $middleware = [
        // ... 省略
        \App\Http\Middleware\RequestLogger::class,
    ];
/var/www/product-project/routes/web.php


<?php

use Illuminate\Support\Facades\Route;
use Illuminate\Support\Facades\DB;
use App\User;

Route::get('/', function () {
    $user = DB::transaction(function () {
        $user = factory(User::class)->create();
        $user->name = 'change name';
        $user->save();
        $user->delete();

        return factory(User::class)->create();
    });

    User::find($user->id);

    return view('welcome');
});

Route::get('hello', 'HelloController@index');
$ php artisan config:clear
$ php artisan cache:clear
$ composer dumpa
CloudWatch Agentを入れる場合
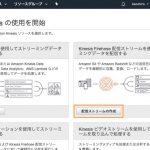
Kinesis Agentを入れる場合[工事中]
Kinesis Agent
openjdkのバージョン検索
$ sudo apt search openjdk-\(\.\)\+-jre$

Sorting... Done
Full Text Search... Done
openjdk-11-jre/bionic-updates,bionic-security,now 11.0.8+10-0ubuntu1~18.04.1 amd64 [installed,automatic]
  OpenJDK Java runtime, using Hotspot JIT

openjdk-8-jre/bionic-updates,bionic-security 8u265-b01-0ubuntu2~18.04 amd64
  OpenJDK Java runtime, using Hotspot JIT
$ sudo apt install -y default-jre
$ git clone https://github.com/awslabs/amazon-kinesis-agent.git
$ cd amazon-kinesis-agent
$ sudo ./setup --install

clean:

get-java-version:

check-java-version:

BUILD FAILED
/home/ubuntu/amazon-kinesis-agent/build.xml:29: Unsupported Java version: 11. Make sure that the Java version is 1.8 or greater.

Total time: 0 seconds
Failed to build the Java project
$ java -version

openjdk version "11.0.8" 2020-07-14
OpenJDK Runtime Environment (build 11.0.8+10-post-Ubuntu-0ubuntu118.04.1)
OpenJDK 64-Bit Server VM (build 11.0.8+10-post-Ubuntu-0ubuntu118.04.1, mixed mode, sharing)
$ sudo apt-get install openjdk-8-jre
$ sudo update-alternatives --config java
There are 2 choices for the alternative java (providing /usr/bin/java).

  Selection    Path                                            Priority   Status
------------------------------------------------------------
* 0            /usr/lib/jvm/java-11-openjdk-amd64/bin/java      1111      auto mode
  1            /usr/lib/jvm/java-11-openjdk-amd64/bin/java      1111      manual mode
  2            /usr/lib/jvm/java-8-openjdk-amd64/jre/bin/java   1081      manual mode

Press <enter> to keep the current choice[*], or type selection number: 2
update-alternatives: using /usr/lib/jvm/java-8-openjdk-amd64/jre/bin/java to provide /usr/bin/java (java) in manual mode
ubuntu@ip-172-31-39-141:~/amazon-kinesis-agent$ java -version

openjdk version "1.8.0_265"
OpenJDK Runtime Environment (build 1.8.0_265-8u265-b01-0ubuntu2~18.04-b01)
OpenJDK 64-Bit Server VM (build 25.265-b01, mixed mode)
$ sudo ./setup --install

Detected OS Distro: Ubuntu
Uninstalling aws-kinesis-agent ...
Removing aws-kinesis-agent from system services...
userdel: user 'aws-kinesis-agent-user' does not exist
groupdel: group 'aws-kinesis-agent-user' does not exist
Installing Kinesis Agent ...
Downloading dependencies ...
Unable to locate tools.jar. Expected to find it in /usr/lib/jvm/java-8-openjdk-amd64/lib/tools.jar
Buildfile: /home/ubuntu/amazon-kinesis-agent/build.xml

clean:

get-java-version:

check-java-version:

init:
    [mkdir] Created dir: /home/ubuntu/amazon-kinesis-agent/ant_build

compile:
    [mkdir] Created dir: /home/ubuntu/amazon-kinesis-agent/ant_build/private

BUILD FAILED
/home/ubuntu/amazon-kinesis-agent/build.xml:39: Unable to find a javac compiler;
com.sun.tools.javac.Main is not on the classpath.
Perhaps JAVA_HOME does not point to the JDK.
It is currently set to "/usr/lib/jvm/java-8-openjdk-amd64/jre"

Total time: 0 seconds
Failed to build the Java project
$ sudo apt-get install openjdk-8-jdk
$ sudo ./setup --install

BUILD SUCCESSFUL
Total time: 7 seconds
Configuration file installed at: /etc/aws-kinesis/agent.json
Configuration details:
{
  "cloudwatch.emitMetrics": true,
  "kinesis.endpoint": "",
  "firehose.endpoint": "",

  "flows": [
    {
      "filePattern": "/tmp/app.log*",
      "kinesisStream": "yourkinesisstream",
      "partitionKeyOption": "RANDOM"
    },
    {
      "filePattern": "/tmp/app.log*",
      "deliveryStream": "yourdeliverystream"
    }
  ]
}
Amazon Kinesis Agent is installed successfully.
To start the aws-kinesis-agent service, run:
  sudo service aws-kinesis-agent start
To stop the aws-kinesis-agent service, run:
  sudo service aws-kinesis-agent stop
To check the status of the aws-kinesis-agent service, run:
  sudo service aws-kinesis-agent status

aws-kinesis-agent log file will be found at: /var/log/aws-kinesis-agent
To make the agent automatically start at system startup, type:
  sudo chkconfig aws-kinesis-agent on

Your installation has completed!
インストール成功!
EC2にIAMロールを作成して割り当てます。
- このロールを使用するサービスを選択:EC2
- ポリシー:AmazonKinesisFirehoseFullAccess
- ロール名:EC2-Kinesis-Full-Role
Data Firehose -> Create delivery stream ->
$ sudo vi /etc/aws-kinesis/agent.json


{
  "cloudwatch.emitMetrics": true,
  "kinesis.endpoint": "",
  "firehose.endpoint": "",

  "flows": [
    {
      "filePattern": "/tmp/app.log*",
      "kinesisStream": "yourkinesisstream",
      "partitionKeyOption": "RANDOM"
    },
    {
      "filePattern": "/tmp/app.log*",
      "deliveryStream": "yourdeliverystream"
    }
  ]
}

●↓変更

{
  "cloudwatch.emitMetrics": false,
  "firehose.endpoint": "https://firehose.ap-northeast-1.amazonaws.com",
  "flows": [
    {
      "filePattern": "/var/www/product-project/storage/logs/laravel*",
      "deliveryStream": "laravel-debug-log"
    }
  ]
}
$ sudo service aws-kinesis-agent restart
関連記事 - More from my site -
 CloudWatch Agent Supervisordのプロセス監視
- AWS CloudWatch Logs MetricsにLoadAverageのメトリクスを追加する
 ECS+LaravelのリクエストログをCloudWatch Logs Insightで解析
- CloudWatch AlarmをSlackに通知
- AWS CloudWatchでオートスケールの複数EC2 モニタリング
 AWS EC2 + Kinesis Firehose + S3でApacheログを集約
 AWS CloudWatch+SNS+Lambda+Serverless Framework+Chatwork API
 CloudWatch LogsとS3関連 メモ
- AWS EBSスナップショット自動化
- RDS MySQL, PostgreSQL スロークエリ関連ログの出力
- AWS SDKによるSQSの操作
- 中央値, 四分位範囲, 四分位偏差, はずれ値
 デバッグ・例外処理の考慮
 SQLパフォーマンス要約 なぜ、SQLは重たくなるのか?──『SQLパフォーマンス詳解』の翻訳者が教える原因と対策